Here is a step by step guide to help you learn How To Do Sublimation Printing and what are the necessary dos and don’ts in this process
I’m such a fan of little customized goodies, and honestly, who isn’t? Customizing different products like shirts, bags, mugs, etc., all of these make amazing gifts to give to your loved ones. But have you ever wondered how you get these products and what’s the process behind the customization? Well, this process is called sublimation printing, and today, I’m going to tell you everything you need to know about it and how you can do it all by yourself!
Sublimation printing is a process by which you can transfer any design or pattern of your choice to various materials. These materials must be either made of polyester or must have a polyester coating. Hence to get maximum results from your digital printing process, try looking for products that are 100% polyester. Here I will give you step-by-step instructions to explain what necessary equipment you will require and how you can attempt this process to get your desired results.
How To Do Sublimation Printing
Things You Need
Before you get right into the method and start thinking about the main process, you need to get some necessary equipment. Of course, there can always be additional products that can help make the process more efficient. However, the following 4 products are ones without which this process is not possible.
- Sublimation ink
- Sublimation printer
- Transfer paper
- Heat press machine
Process
Step 1: Create Your Desired Design
Whether you are considering customizing a product for yourself or a customer, first and foremost, you need to select your pattern. Now there are several ways you can do that, but I recommend opting for product designer software. Using this software, one can select their product of choice and select the specific design that looks most appropriate for the product.
Once the product and the design have been selected, the information is transferred in form of a print file. Basically, the software generates all the needed information regarding the graphics to start looking at the printing process with ease. Now, if the image quality is good enough, you will get amazing results on the product as well.
However, sometimes you may see a difference in color saturation or blurring of the image if the print file does not have the best graphics. To ensure this, you need to make sure the image is generated using high-resolution software. If you possess high-quality software, then whether whatever form of print file type you generate, the image quality will be good enough. However, some types of file types like the PNG come with a 300 dpi resolution promising you even better results.
Moreover, I personally don’t recommend using high-end design software like Adobe because these can be difficult for common people to access. In this case, if you’re trying to get better customer satisfaction, this will not be very helpful. Hence the product design software is the one I want to emphasize because it will be more beneficial for commercial use.
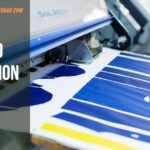
Step 2: Print The Design Onto The Product.
As mentioned earlier, before you start the process of printing, make sure you have the right kind of equipment for it. So while you move to print the design onto the product, first and foremost, you need to select the right kind Of product to be printed.
Now, the dye used for the printing process is made up of certain particles that bond only with the polymer material. Hence you need to ensure your products are either polymer-coated or 100% polymer. In this way, the dye particles will bond better to the material, and you can achieve better and clearer image quality. Other than polymers, sublimation printing is also applicable to metals, glass, and different forms of ceramics.
Once you select the right kind of product which you want to print, this step requires you to pick the right kind of printer as well. To help you with this I can suggest some of the well-known brands in this category. These include the HP sublimation printed, the Epson printer, another one from Mimaki, and many more.
Now that you have both the right kind of product and the machine, we move onto the ink. Since I’ve been using the Epson printer, I personally prefer using the EPSON EcoTank Dye Sublimation Ink. What’s good about this ink is that it works with every printer that comes in the Epson range. Similarly, coming in a range of colors makes it easier for you to choose your pick.
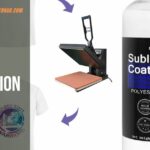
Now we come to the medium of transfer in this process, i.e., the sublimation transfer paper. If you’ve got all the above-mentioned products in the best qualities, but your transfer paper is not up to the mark, then your results will be far from what you desire. Hence always go for the premium quality transfer papers you find in the market. The better the quality, the better the dye particles will transfer onto the product and give you a vibrant print.
Step 3: Heat Transfer From The Heat Press
This step greatly depends on the type of heat press that you use. However, apart from the device that you use, other factors also impact the efficiency of the process. These factors include the regulation of time, temperature, and pressure during the process.
The time that one requires for the printing process depends on the type of product they are using. For example, for a harder product like a mug or class, you will have to increase the time duration of the printing process. Whereas for a product like a t-shirt, you can complete the process in about 30-60 seconds. However, apart from the duration of the printing, the dwell time also differs for each product.
Other than the product, various factors can impact the optimum time you will require for the best results. Sometimes the altitude of your workspace might have its effect; sometimes, even the moisture in the air could be a contributing factor. Therefore, you need to try out multiple samples before establishing the preferred printing time based on your experience.
The second factor that can impact the heat transfer process is the temperature change. Now the standard temperature that is usually set by the printing machines is 204 degrees Celsius. However, this cannot be the ideal temperature for all kinds of products. You need to adjust it according to the melting points of the materials that you are selecting. Therefore it is necessary to carry out a little research or look into the manufacturer’s instructions carefully to understand what works best for you.
To understand exactly how much pressure to apply for the perfect sublimation printing for each product, you need to look at the breaking points for each product. Usually, low to medium pressure is sufficient for the basic printable product. However, trial and error is the only way to be sure.
If you’re gonna be going for the trial and error procedure, the process for that requires the use of a manual heat press. Now, if you’re testing it for a t-shirt, place the article and press the machine hard enough until you get a clear print. In the case of ceramics, start with only 30-40 psi. These products are more fragile, so applying more pressure could lead to breakage. Once you’re done, you’ll see your product stamped with the same print that you desired.

Precautions
Now as simple as it sounds, there are a few things that you need to take care of when carrying out the process. Firstly make sure your workplace is clean and there are not many impurities in the surrounding atmosphere. Moreover, the proper grounding of the printer is necessary. This helps ensure the static from the electricity doesn’t impact the printer results.
It would be best if you also were careful when handling the sublimation transfer paper. Touching this directly may contaminate its surface and lead to a low-resolution result. One more thing to check is that your heat press should not have gaps when closed. This can also lead to a blurry print.
FAQs
Can you print sublimation with a regular printer?
No, the regular printers do not have the ink cartridges found in the special printers used for sublimation printing; hence you cannot use them.
Is sublimation ink waterproof?
Yes, most high-quality sublimation inks are waterproof. So you can wash the textiles and ceramics that you print as per convenience.
Is sublimation ink permanent?
Yes, when printing the ink onto the material, it is not removed by washing or scraping off; hence sublimation ink is permanent.
Conclusion
So now we are aware of all the basic steps that you can follow to customize your own objects with your own favorite designs.
Whether you are thinking of starting a business or trying out sublimation printing for your own enjoyment, it’s an amazing activity to learn and try. There’s a possibility you may not do quite well the first time. But remember, practice makes perfect! So, keep trying, and I can guarantee you with these simple steps and tips, you are sure to become a pro at customization in no time!